

Disk space is mandatory requirement when it comes to tech in general. Azure provides multiple way of utilizing it, blob storage being among the most popular ones. There are other options as well such as Azure Files, Azure managed Disks(for VMs), Azure Tables, Azure Queues and Azure Container Storage. In this post, I will focus on WHEN to use Azure Blob Storage compared to other resources.
When to use azure blob storage
Azure blob storage is mainly used for unstructured data. Unstructured data are for example images, text files, videos, binaries, documents etc. It does not follow any particular data model and therefore is very universal and can be used in many use cases such as:
- Backups of data of various size
- Serving static content for web sites
- Writing various types of logs
- Streaming (audio and video)

If you want to access your data from anywhere, Azure Blob Storage is definitelly a way to go. The reason beingn is that data stored in here are accessed trough HTTP/HTTPS by using Azure Storage REST API, Azure PowerShell and Azure CLI. On top of that, there are multiple sdks for various languages, such as:
- .NET
- JAVA
- Node.js
- Python
- GO

When NOT to use azure blob storage
Given various disk options, you may be wondering when not to actually use blob storage. Here are few examples:
- Low-Latency, high-throughput database requirements – use azure SQL database
- Complex querying and analytics requirements – use Azure Synapse Analytics
- Sharing data between VMs – use Azure Files
- Storing sensitive information like connection strings, password – use keyvault instead
- Communication between micro services – use Azure Queues
- Using storage for VM – use Azure managed Disks
- NoSQL store – use Azure Tables or CosmosDB
- Storage for containers – use Azure Container Storage
Blob storage access tiers
Access tiers allow you to store your data based on how frequently it is accessed. Right now there are 4 access tiers available:
- Hot tier – ┬átier optimized for storing data that is accessed or modified frequently
- Cool tier – ┬átier optimized for storing data that is infrequently accessed or modified
- Cold tier – ┬átier optimized for storing data that is rarely accessed or modified, but still requires fast retrieval
- Archive tier – tier optimized for storing data that is rarely accessed, and that has flexible latency requirements, on the order of hours
How to create azure blob storage
Creating blob storage is pretty straight-forward. In this tutorial we will first create blob storage manually using portal and then I will show you how to create it using infrastructure as a code – bicep.
Create storage account
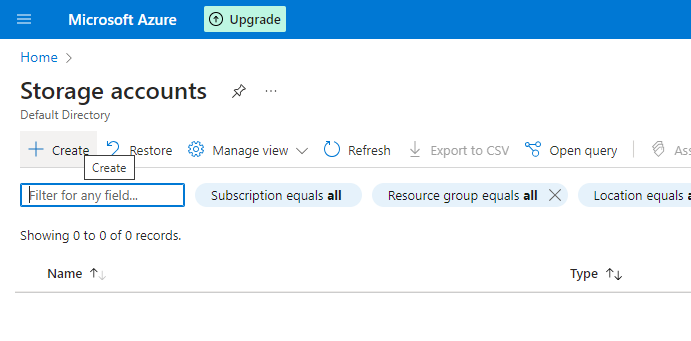
- First go to azure portal and search for storage account. Click on create.
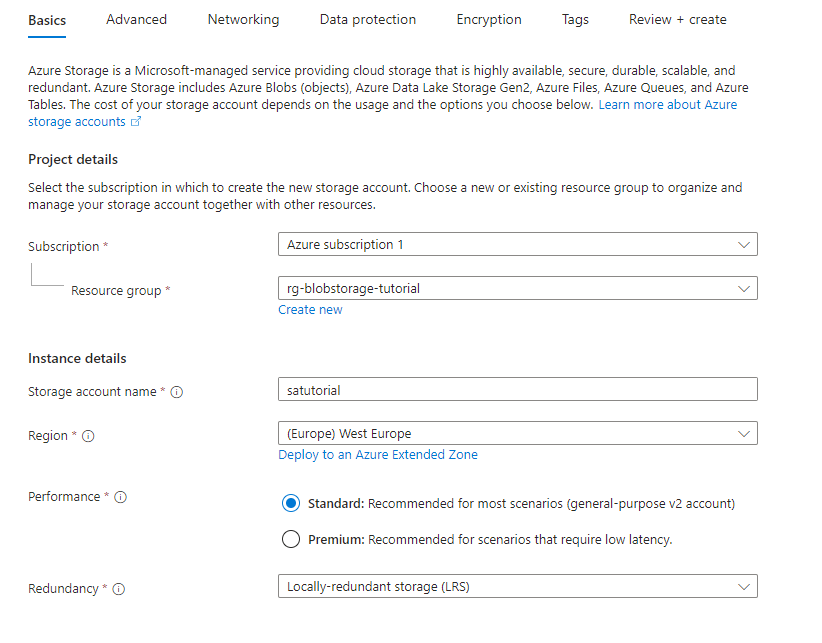
- You are presented with various options regarding storage account. Choose appropriate resource group, subscription and region. Also, for the sake of this tutorial I will only use standard performance and locally-redundant storage.
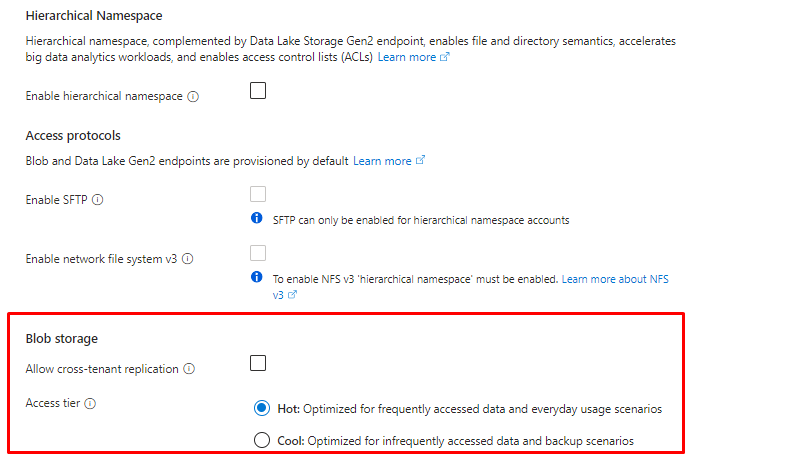
- Moving to the advanced tab, keep the default values. We are basically allowing REST HTTPS access with shared key. You can also allow anonymous access or Microsoft Entra authenication, but for the sake of this tutorial I will not use those options. I am choosing Hot tier, but you should choose the tier based on your requirements.
- Moving to networking tab, keep everything as is. This ensures that the storage account is accessible from public network.

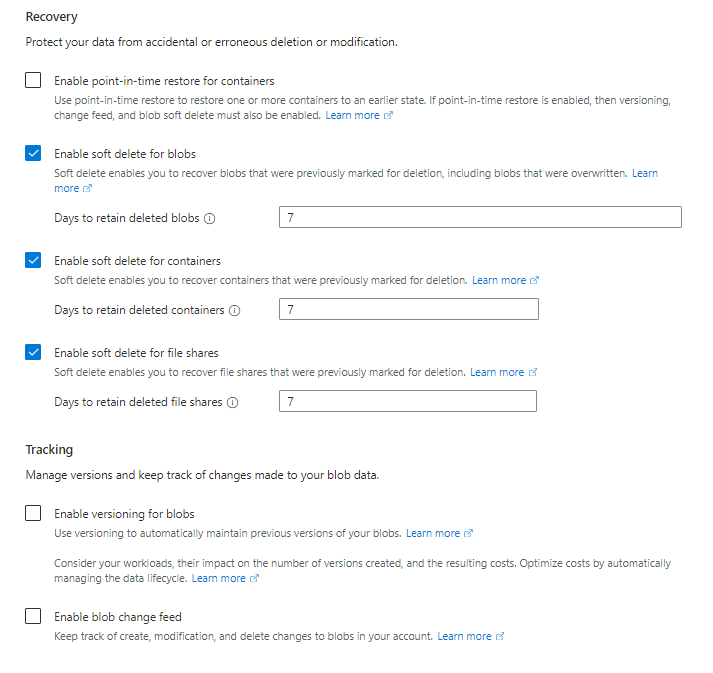
- In Data protection section, keep everything as is as well. This section manages accidental deletions or modifications.
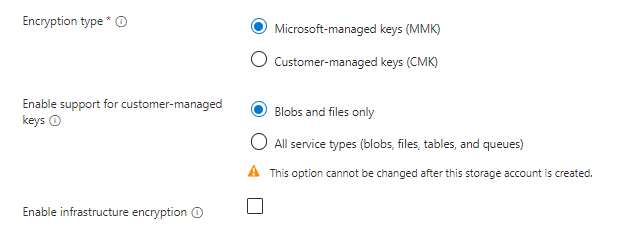
- In Encryption tab, again keep everything as is. Data will be encrypted by using microsoft-managed keys.
- As last step head to Review+Create and finish the process. Deployment may take a few minutes, so please be patient.
Create container and upload file(blob)
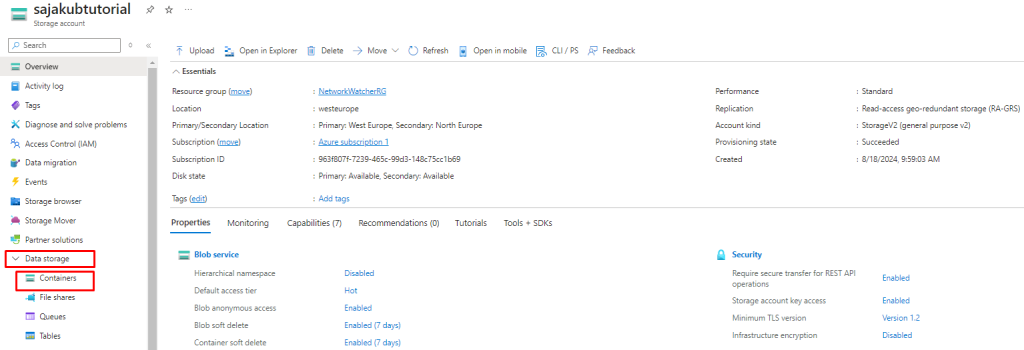
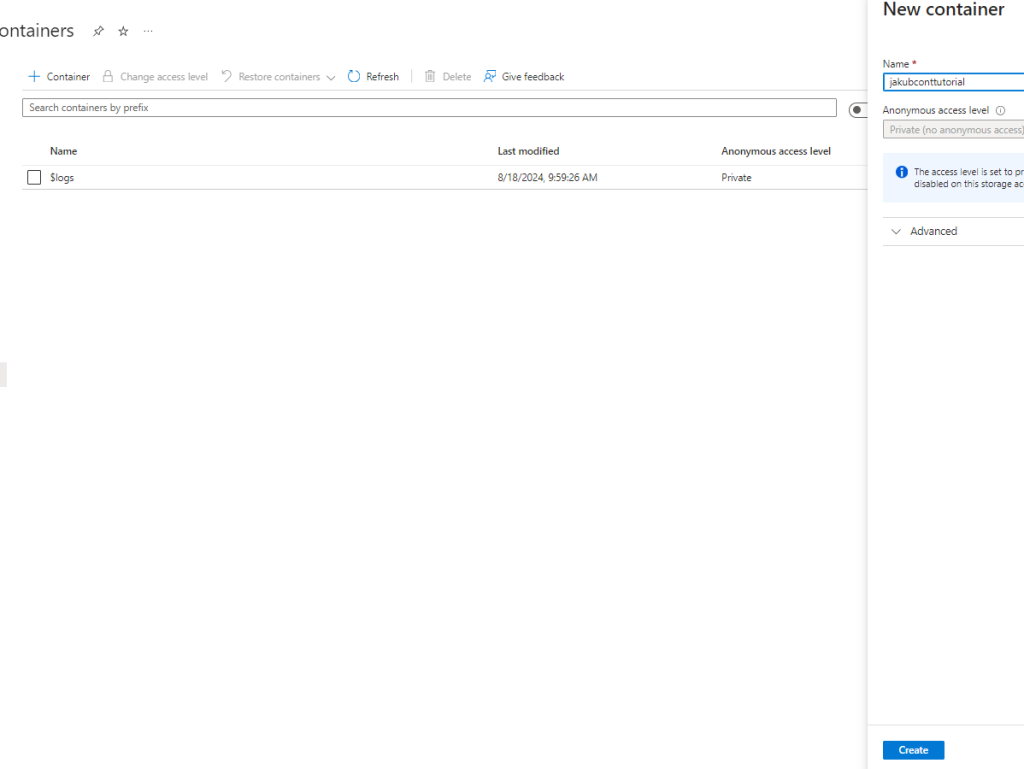
- Now that the storage account is created, head to it in azure portal. Go to Data Storage in left menu and click on containers. You are presented with all currently available containers. Because the storage account was created just now, there is only one container named $logs, which contains logs related to this storage account. Choose the name for your container and create it.
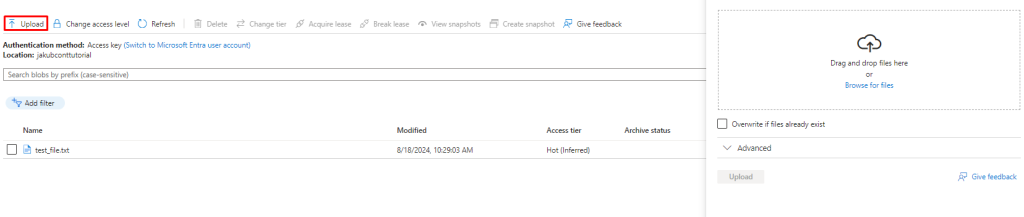
- You can now head to the created container and click on “Upload” in order to upload files to it.
Create azure blob storage using bicep(IAAC)
As on-premise companies increasingly move to cloud, infrastructure as a code is becoming more and more popular. Using for example bicep or terraform is a must, especially when it comes to bigger companies. Simply clicking the resources in portal is not sufficient enough. These are some of the advantages of using IAAC:
- Repeatable Deployments: IaC ensures that every deployment is identical, reducing the risk of human error and configuration drift.
- Speed: Automating the provisioning and management of infrastructure saves time and reduces the need for manual intervention.
- Scalability: IaC can easily scale resources up or down based on demand, facilitating auto-scaling and high availability.
- Continuous Integration/Continuous Deployment (CI/CD): IaC integrates well with CI/CD pipelines, enabling automated testing, provisioning, and deployment of infrastructure.
In this tutorial, I will use bicep because I have the most experiences with it, but feel free to experiment with other tools as well(terraform, jenkins, etc.).
If you want to replicate the commands and code which I use, make sure you have installed the following prerequisities:
- Visual studio code – https://code.visualstudio.com/download
- Az command line tool – https://learn.microsoft.com/en-us/cli/azure/install-azure-cli-windows?tabs=azure-cli
- Bicep extension in vscode
Create the file named main.bicep and insert the following code:
param location string = resourceGroup().location

resource storageAccount 'Microsoft.Storage/storageAccounts@2022-09-01' = {
  name: 'sajakubtutorialbicep'
  location: location
  sku: {
    name: 'Standard_LRS'
  }
  kind: 'StorageV2'
}

resource blobService 'Microsoft.Storage/storageAccounts/blobServices@2023-01-01' = {
  name: 'default'
  parent: storageAccount
}

resource blobContainer 'Microsoft.Storage/storageAccounts/blobServices/containers@2023-01-01' = {
  name: 'jakubcontbiceptutorial'
  parent: blobService
}
In this bicep code I basically create 3 resources:
- Storage account: I named it ‘sajakubtutorialbicep’ with default ‘sku’ and kind set to ‘StorageV2’ which is general-purposed storage account.
- Blob service: You can think of this as a interface between storage account and container. This is something you do not see when creating resource in portal, but you have to create it when using bicep. I used the ”default’ name. I also set it’s ‘parent’ attribute to storage account resource.
- Container: I named it ‘jakubcontbiceptutorial’ and set it’s ‘parent’ attribute to blob service resource created above. This way I linked the container to the storage account.
Now before I apply the changes I always like to run the ‘what-if’ command before. This command will show you which resources are going to be created/modified/deleted. It is good practice to run it before deploying resources, so you do not accidentally mess with existing resources. Do not forget to change the resource group name:
az deployment group what-if --resource-group rg-blobstorage-tutorial --template-file .\main.bicepOutput:
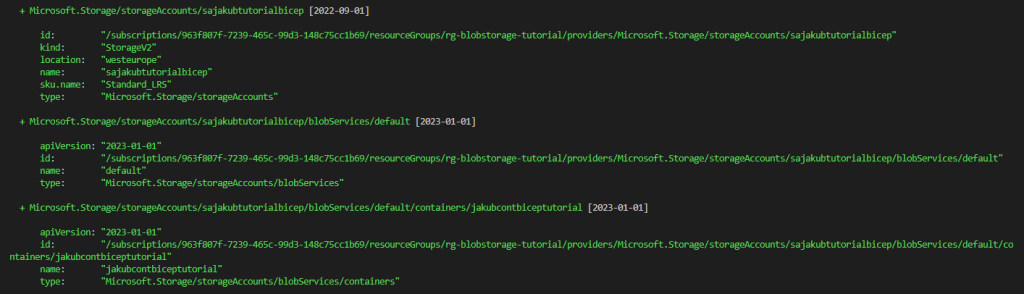
- Based on the output you can see that 3 resources will be added to my resource group, which is expected behaviour.
Now that I checked that everything in my resource group will be created as expected I run the following command, so that the changes shown in previous command actually get applied:
az deployment group create --resource-group rg-blobstorage-tutorial --template-file .\main.bicepIf everything runs as expected, the command will return deployment info in form of json. You can look through the properties of it, but generally speaking if the command did not return an error then everything shall be created and you should see your resources in portal.
Conclusion
In this tutorial I walked you through storage account topic, explained to you what it is, it’s different variations and how to create one.
Storage accounts are great way to store your data if you are using Azure. It allows you to create and manage data, manage access to it and use various options to increase your availability.
I encourage you to using bicep as much as possible. It is preferable way to manage your resources and will come very handy when your infrastructure in Azure will grow.