
As organizations move away from traditional passwords, Azure (via Microsoft Entra ID) offers several modern authentication options to boost security and simplify the sign-in experience. In this post, I’ll explain what these options are, how they work, and how you can implement them — including passkeys, security keys, the Microsoft Authenticator app, and more.
🧭 Why Modern Authentication Matters
Passwords alone are no longer enough to keep accounts safe. Weak, reused, or stolen credentials are behind most security breaches. Modern Azure authentication methods reduce this risk by adding extra factors or replacing passwords altogether.
Key benefits:
- Stronger protection against phishing and credential theft
- Faster and more seamless user sign-in
- Reduced password reset overhead and helpdesk tickets
🔐MFA for Azure mandatory as of 2025
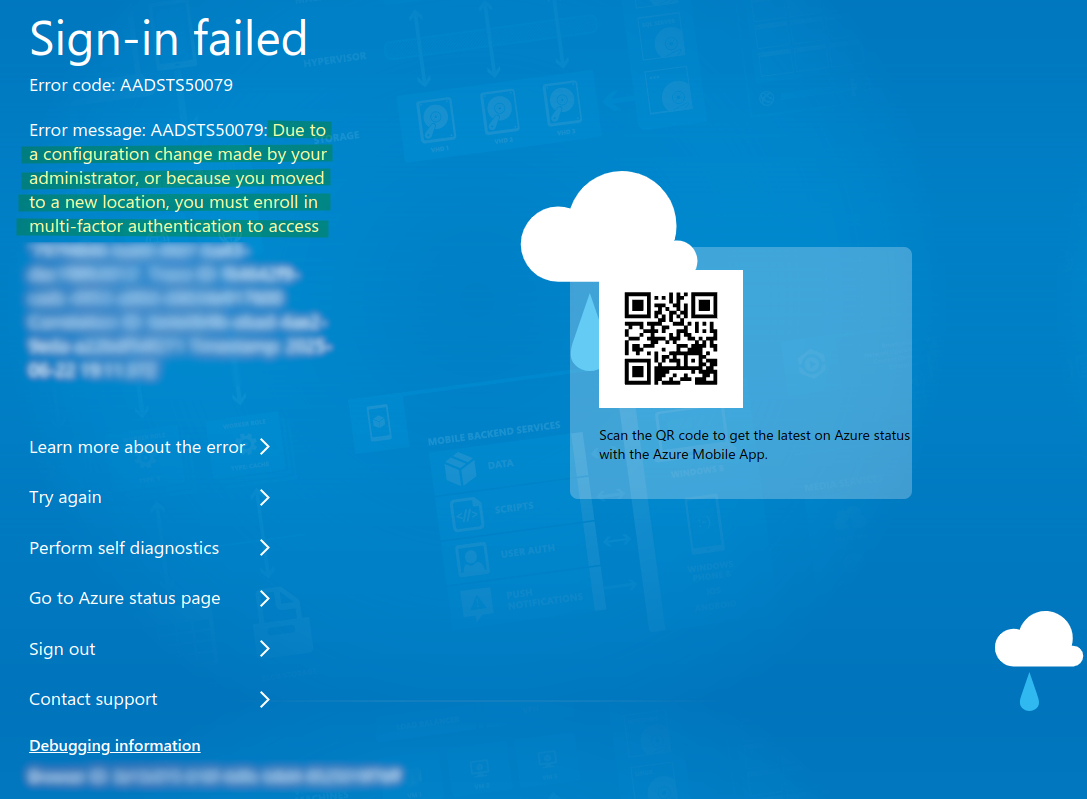
As of 2025, the MFA for Azure is mandatory. Learn more in this post from Microsoft. The post mentions, that according to Microsoft, more than 99.2% of account compromises can be mitigated via enforcing MFA – therefore, as of 2025 the MFA is enforced by default.
I tried multiple ways to disable the MFA (such as disabling the Security Defaults) and then creating a new user, but I was always presented with the following screen:
1️⃣ Microsoft Authenticator App (Passwordless & MFA)
What it is:
A free mobile app that allows users to approve sign-ins via notifications or number matching without entering a password. When you create the new Azure account, the Authenticator App is pre-set by default.
How to Configure Authenticator app for MFA
To edit authentication methods, visit the Microsoft Entra admin center. From there head to
Identity -> Protection -> Authentication methods:
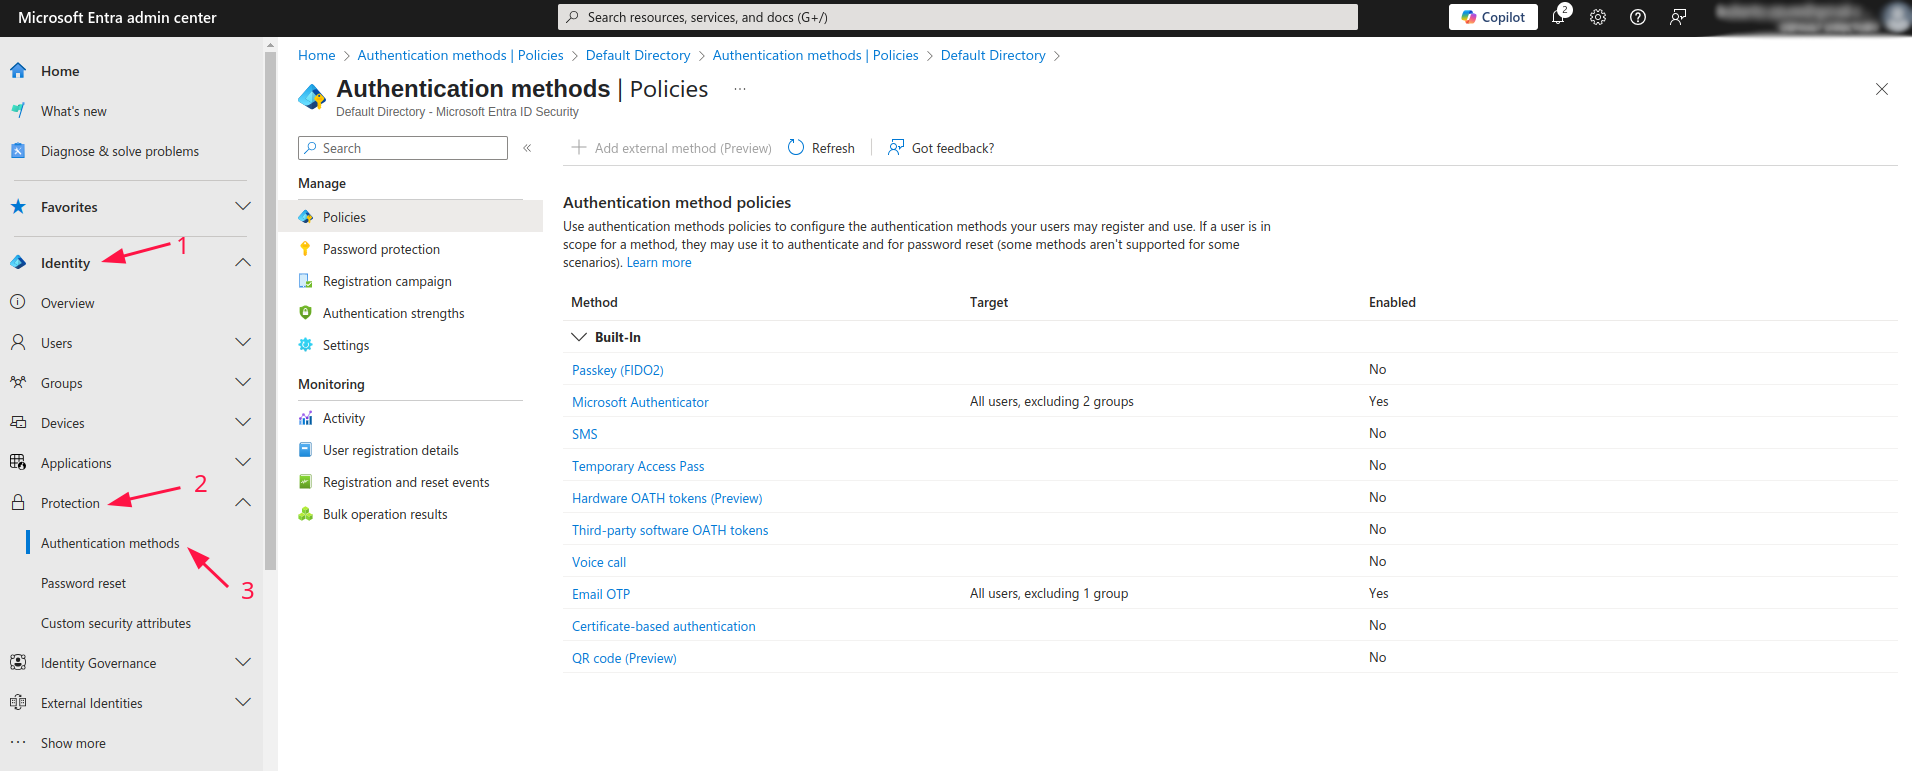
Then you are presented with various options for authentication method policies. Click on Microsoft Authenticator:
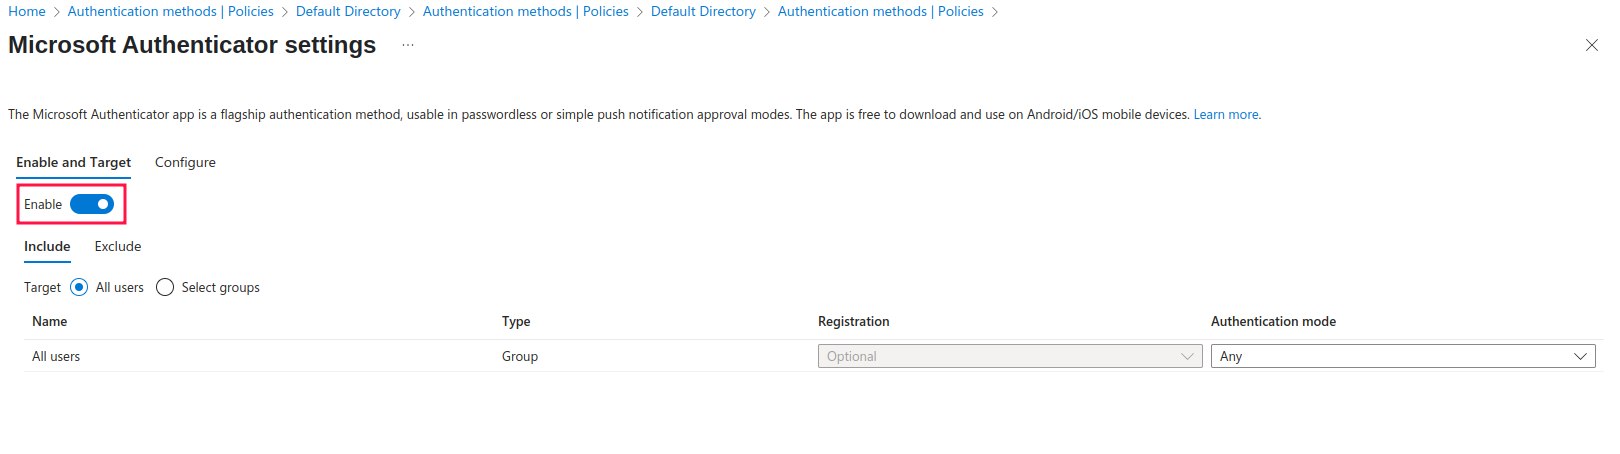
Make sure to enable the setting by clicking on the button toggle. Below the button are the Include and Exclude sections. This sections specify on which user groups does the policy apply to. By default, it applies to All Users as shown in the picture.
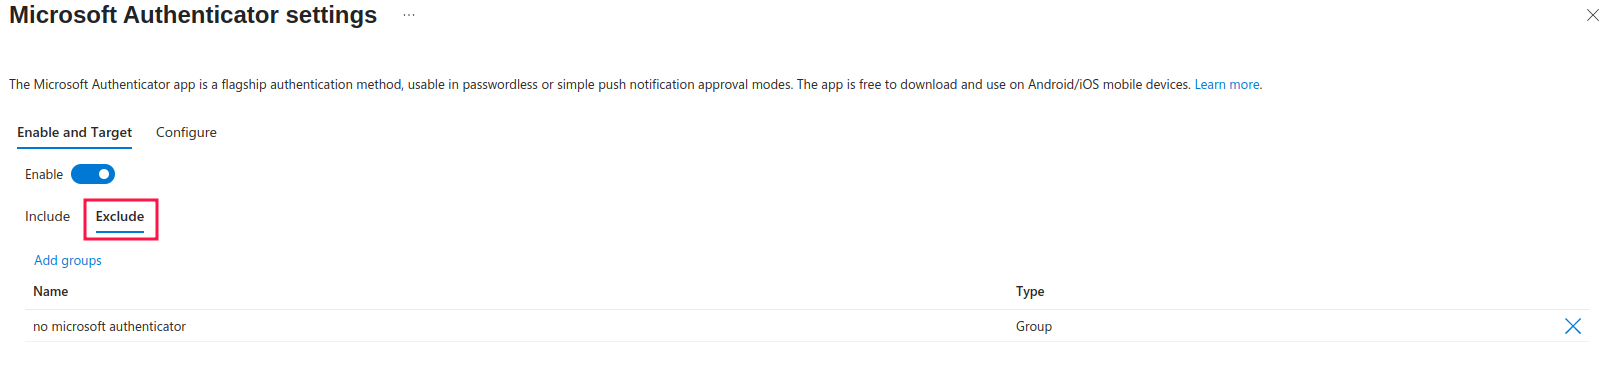
For the sake of this tutorial, I also created and added the group to be excluded from the policy:
To configure the settings, head to the Configure tab:
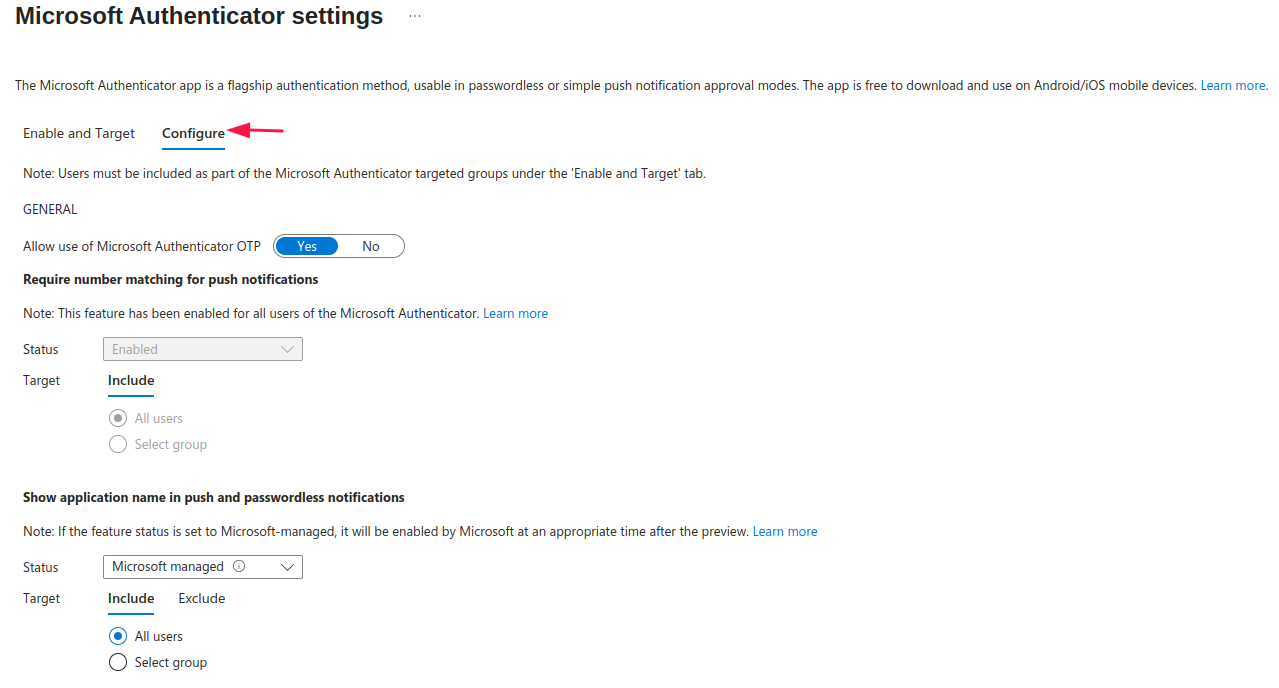
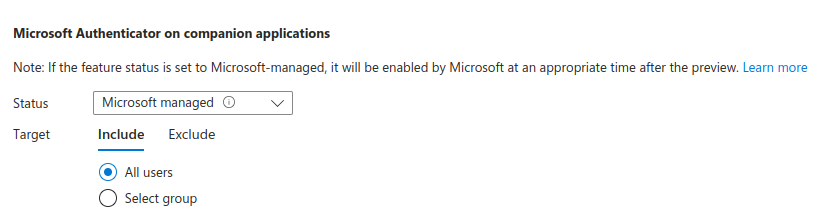
In the settings you mostly configure whether to shown additional information in the Authenticator app, such as application name, geographic location as well as info on companion applications. Option called: Require number of matching for push notifications is enabled by default and can not be changed.
How to Configure Authenticator app for passwordless login – FIDO2
Passkey is another form of MFA. In Azure, you can configure passkeys with Microsoft Authenticator to enable a more seamless authentication experience. By having passkey in Authenticator you already fulfill two factors of authentication:
1. Something you have – Authenticator App on your phone
2. Something you are – additional biometrics for passkey (authentication via an eye)
You can also replace biometrics for something you know, such as PIN.
Going back to Authentication methods, click on Passkey (FIDO2):
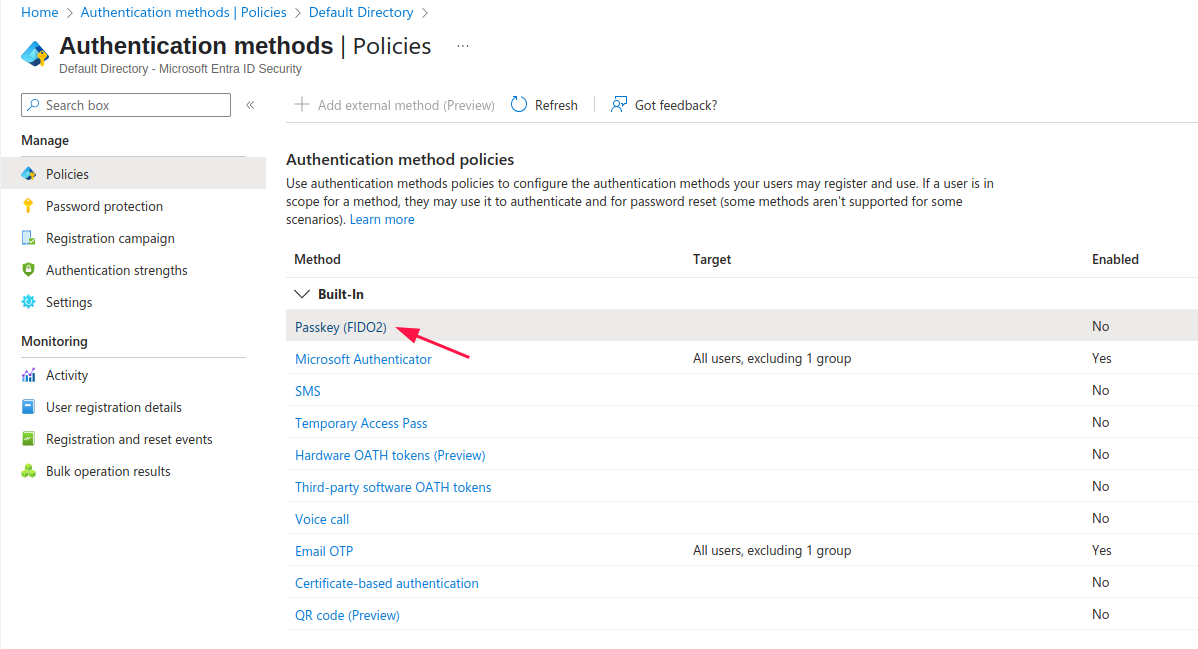
Same as with Authenticator App, you are presented with Include and Exclude tabs. As I already discussed its purpose, I will head straight to the Configure tab:

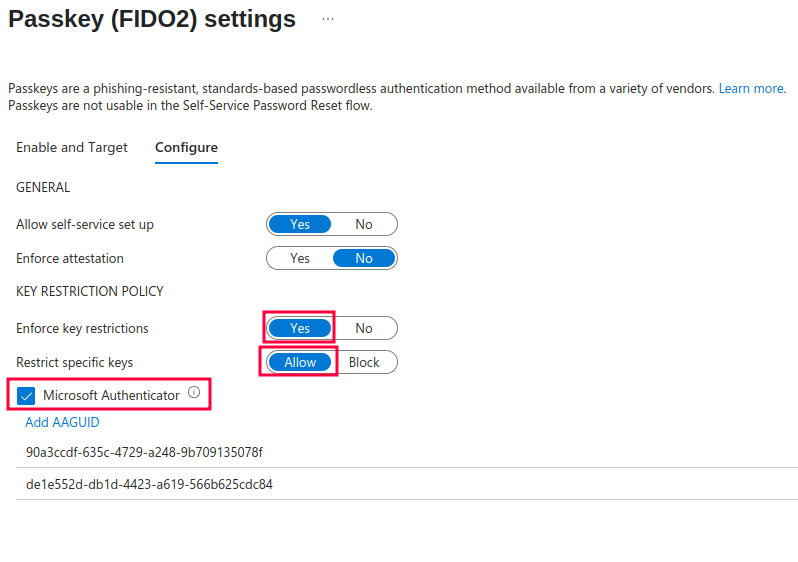
Allow self-service set up – this option defines whether users can configure the passkey via themselves using Security Info.
Enforce attestation – set to ‘Yes’ if you want to be sure that FIDO2 passkey provider is from the legimate vendor – therefore meets the Microsoft’s requirements. To learn more visit this post. The requirement is only checked when user is being registered. If it is set to ‘Yes’ after the user is registered, he can still log in via registered key.
Enforce key restrictions – this tightly relates to the previous option ‘Enforce attestation’. If you only want to allow certain FIDO keys for registration as well as authentication, use this option. If the user previously registered with certain FIDO key model and you Block it / Not allow it in AAGUID list, he can no longer log in using it.
Note: FIDO2 passkey providers are specified using AAGUID – you can think of it as simple ID.
If you only want to allow Microsoft Authenticator app for the passwordless authentication use this options (the two AAGUIDs that are added are for iOS and Android Authenticator app):
How to setup Microsoft Authenticator app passkey as a user
Now that I’ve shown you how to configure the Authenticator App for either MFA or passwordless login, I’ll guide you through the process of setting it as your authentication method. This method is preferred by users as they do not have to type-in password every time they log in.
Note: I will not walk you through the process of setting up the Authenticator App for MFA as this is the default option for Azure and Entra ID.
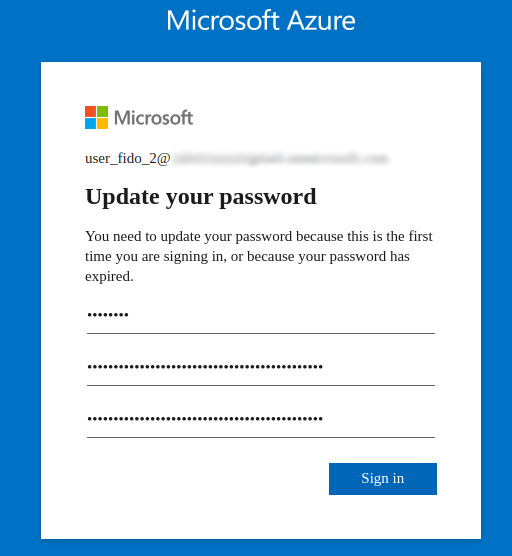
- Log in with your created user – if he was just created, set up the new password for him:
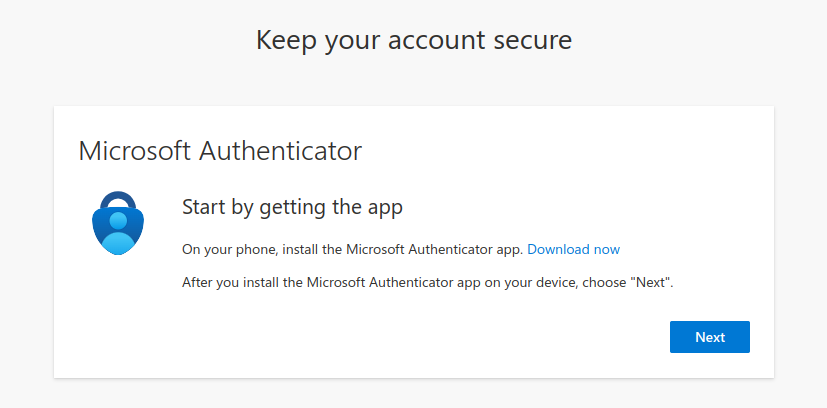
- After that you are prompted to setup the Authenticator App. Proceed with the process:
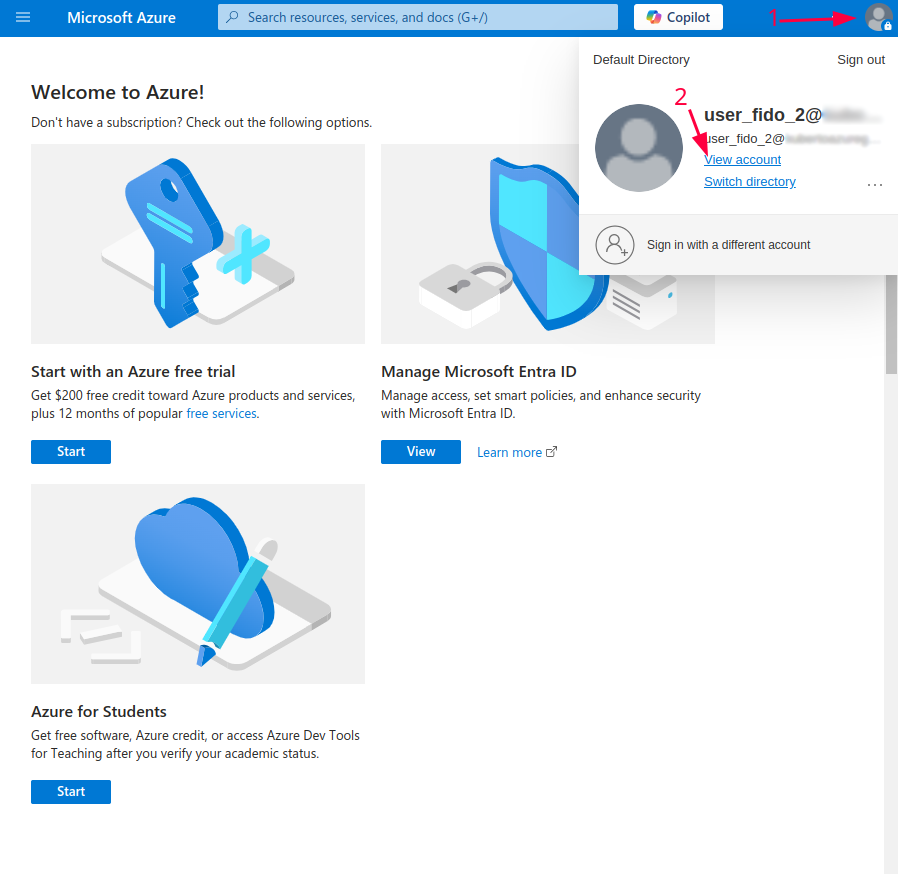
- Go to ‘View account section’
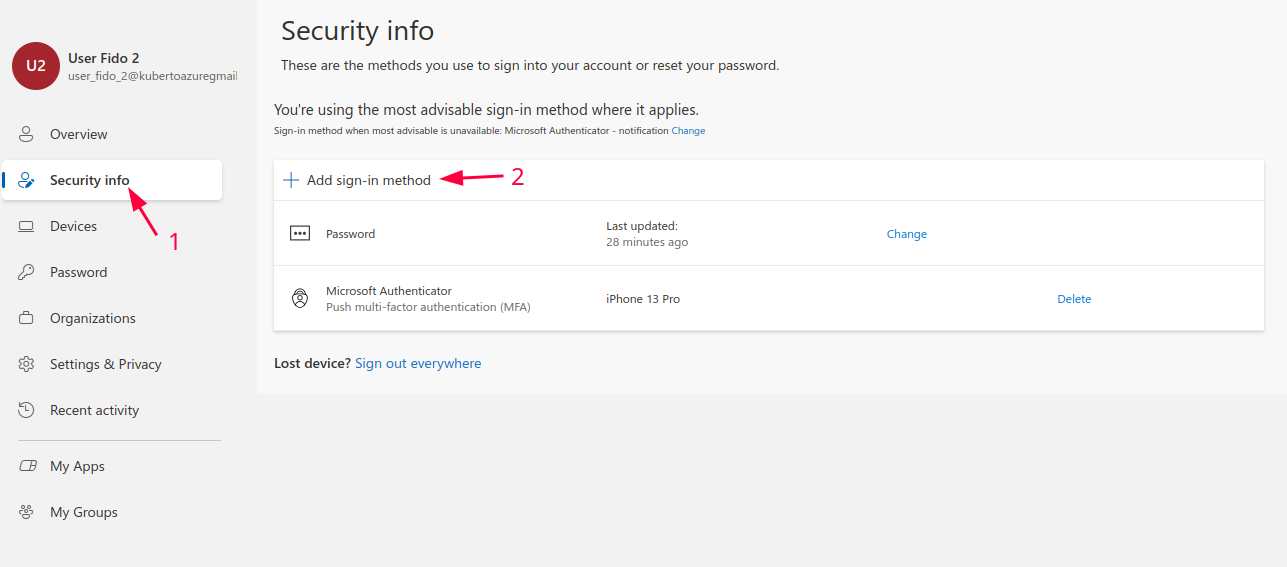
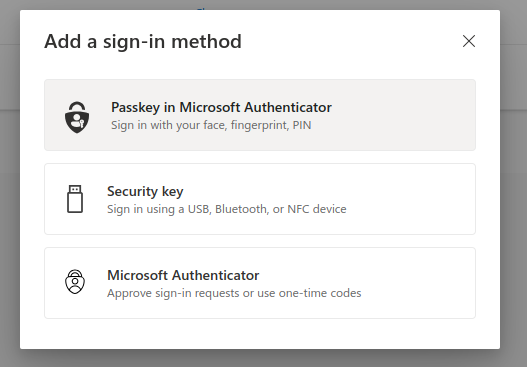
- Then go to Security Info -> Add sign-in method
- Choose Passkey in Microsoft Authenticator
- Go through the wizard and setup your passkey in Microsoft Authenticator App
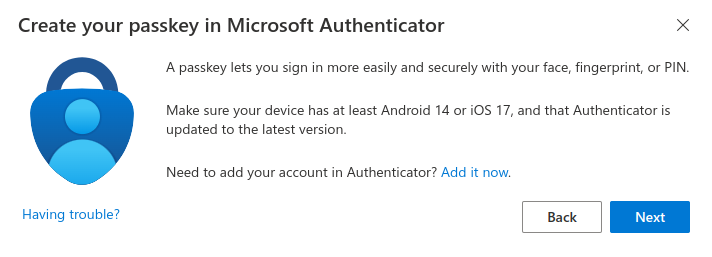
The process is pretty straight forward – open the Authenticator App -> click on your user’s account -> click Create Passkey -> enter the password
- After the process is completed, the Passkey is added as a new sign-in method:

✅ Conclusion
As passwords grow increasingly insecure, modern authentication methods in Azure via Microsoft Entra ID offer stronger, simpler alternatives. With tools like Microsoft Authenticator, passkeys, and FIDO2 keys, organizations can better protect against phishing and credential theft. With MFA becoming mandatory in 2025, now’s the time to adopt these methods, improve security, and streamline the sign-in experience.